
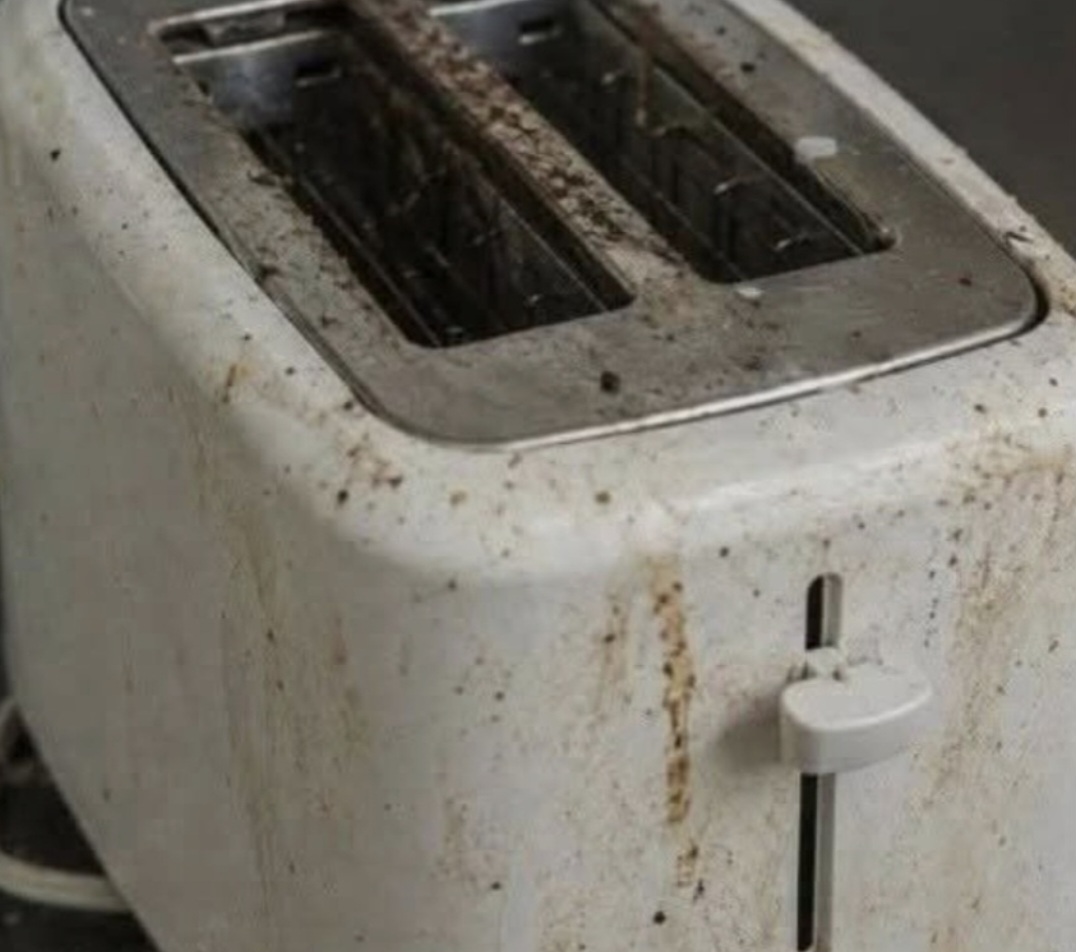
Step 3 — Tackle the Exterior Grease and Stains
- Mix equal parts white vinegar and warm water in a small bowl, or apply a small amount of dish soap directly to a damp microfiber cloth.
- For heavily greased surfaces, spray a kitchen degreaser and let it sit for 2 to 3 minutes before wiping.
- Scrub the exterior surfaces gently using the damp cloth, paying extra attention to stained or sticky areas.
- For tough, dried-on spots, make a paste using baking soda and a few drops of water. Apply it to the stain, let it sit for 5 minutes, then gently scrub with the toothbrush.
- Wipe everything down with a clean damp cloth to remove any soap or vinegar residue.
- Use cotton swabs to reach into tight crevices around buttons, dials, and edges.
Step 4 — Clean the Chrome or Metal Parts
- Dampen a cloth with undiluted white vinegar and rub it over any chrome or stainless steel accents.
- This will help dissolve mineral deposits, water stains, and light rust spots.
- Buff dry immediately with a clean cloth to restore shine and prevent streaking.
Step 5 — Final Drying and Safety Check
- Once all parts have been cleaned, allow the toaster to air dry for at least one to two hours before plugging it back in.
- Make absolutely sure the interior is completely dry before use, as any moisture near the heating elements can be dangerous.
- Reinsert the dry crumb tray and do a quick visual inspection to ensure nothing looks damaged or out of place.
- Plug it in and run it on a low setting for one cycle to burn off any remaining residue — do this in a well-ventilated area.
How to Prevent Your Toaster From Getting This Bad Again
Prevention is far easier than deep cleaning. Empty the crumb tray at least once a week, wipe down the exterior every few days with a damp cloth, and avoid leaving greasy or wet foods near the toaster. If you are lending appliances to others, consider establishing a simple cleaning agreement upfront so everyone is on the same page about care and maintenance.
When Is It Time to Replace the Toaster Instead?
If the toaster has visible damage to the cord, the heating elements appear broken or corroded, there is signs of mold inside that cannot be fully removed, or the appliance smells burnt even after a thorough cleaning, it may be safer and more practical to replace it entirely rather than risk using a compromised appliance.
With the right approach and a bit of determination, most toasters — even heavily neglected ones — can be restored to a safe and usable condition. Take it one step at a time and do not rush the drying process. Your patience will pay off.