
Why You’ll Love This Creamy Homemade Honey Recipe
There’s something incredibly satisfying about making your own pantry staples, and this creamy homemade honey recipe is no exception. If you’ve ever wondered how to transform regular liquid honey into a thick, spreadable delight, you’re in for a treat. This process, often called creaming or naturally crystallizing honey, results in a luxurious texture that’s perfect for toast, scones, or even as a natural sweetener in your morning coffee or tea. Unlike store-bought creamed honey that can sometimes contain additives, this recipe uses only pure honey, allowing you to enjoy all its natural goodness.
You’ll love this recipe because it’s:
- Simple: Requires minimal ingredients and straightforward steps.
- Versatile: Ideal for spreading, baking, and sweetening.
- Economical: Often more cost-effective than buying specialty creamed honey.
- Natural: No artificial ingredients, just pure, delicious honey.
- Customizable: Choose your favorite type of raw honey for unique flavor profiles.
The Magic of Creamed Honey
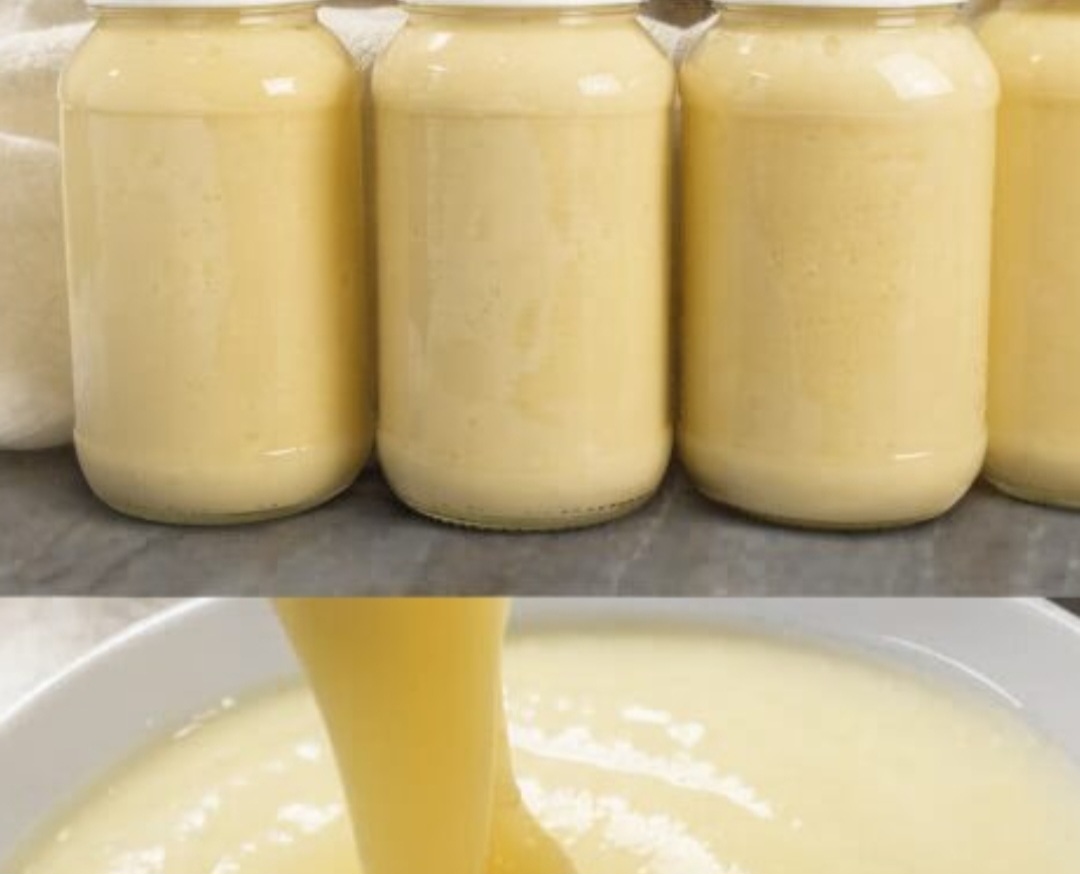
Creamed honey, also known as whipped honey, spun honey, or set honey, is simply honey that has been processed to control its crystallization. All natural honey will eventually crystallize; this recipe just guides that process to create a smooth, fine crystal structure instead of large, gritty ones. This makes it incredibly stable, preventing it from separating or becoming too hard, and gives it that delightful, spreadable consistency seen in the image.
Ingredients for Creamy Homemade Honey
Making creamy honey is surprisingly simple and requires very few ingredients. The key is in the quality of your main ingredient: honey!
- 1 kg (approx. 2.2 lbs) Liquid Honey: Choose a good quality, raw, unfiltered honey for the best results. Lighter honeys tend to produce a paler, more visually appealing creamed honey, but any variety will work.
- 100g (approx. 3.5 oz) Creamed Honey Starter: This is crucial. You’ll need a small amount of already creamed honey to kickstart the crystallization process. If you don’t have any, you can make your own by letting a small amount of liquid honey crystallize naturally over a few weeks, then mashing it until smooth. Alternatively, purchase a small jar of creamed honey to use as your starter.
Ingredient Notes
- Choosing Your Honey: The type of honey you start with will significantly impact the flavor and color of your final product. Floral honeys like clover, alfalfa, or orange blossom are excellent choices for a mild, sweet creamed honey. Darker honeys, such as buckwheat, will yield a richer, more robust flavor. Experiment to find your favorite!
- The Importance of the Starter: The creamed honey starter acts as a seed for crystallization. It contains tiny honey crystals that encourage the liquid honey to crystallize in a fine, smooth manner, rather than forming large, coarse crystals. Ensure your starter is smooth and free of large lumps.
- Storage Containers: As seen in the image, clean glass jars with tight-fitting lids are ideal for storing your finished creamed honey. Ensure they are sterilized before use to prevent any contamination.
How to Make Creamy Homemade Honey
Follow these steps to create your own delightful creamy honey.
- Prepare the Liquid Honey: If your liquid honey has already started to crystallize or is very thick, gently warm it in a double boiler or a bowl set over a pot of simmering water. Do not let the temperature exceed 100°F (38°C) as high heat can destroy beneficial enzymes and alter the flavor. Warm it just enough to make it fully liquid and easy to stir.
- Combine with Starter: In a large, clean bowl, combine the warmed liquid honey with the creamed honey starter.
- Mix Thoroughly: Using a spoon, spatula, or a hand mixer on low speed, mix the liquid honey and starter thoroughly. The goal is to evenly distribute the starter crystals throughout the liquid honey. Mix for about 5-10 minutes, ensuring no streaks of unmixed starter remain. The mixture should appear uniform.
- Pour into Jars: Carefully pour the mixture into clean, sterilized glass jars, leaving about half an inch of headspace at the top. Seal the jars tightly with their lids.
- Cool and Store: Place the sealed jars in a cool, dark place with a consistent temperature, ideally between 55-65°F (13-18°C). Avoid extreme temperature fluctuations, as this can lead to uneven crystallization.
- Wait for Crystallization: This is the patience step! The honey will slowly begin to crystallize and thicken over the next few days to a few weeks, depending on the temperature and the type of honey used. Check the jars periodically. Once the honey has a uniform, opaque, and spreadable consistency, it’s ready.
- Enjoy: Once fully creamed, your homemade honey is ready to be enjoyed!
Helpful Tips for Perfect Creamy Honey
- Temperature Control: Maintaining a consistent cool temperature during the crystallization phase is key. Too warm, and it might not cream properly; too cold, and it might take a very long time.
- Gentle Warming: When liquefying honey, always use gentle heat. Microwaving is not recommended as it can heat unevenly and degrade the honey’s quality.
- Cleanliness is Key: Ensure all your equipment and jars are scrupulously clean and sterilized to prevent any unwanted fermentation or spoilage.
- Patience: Don’t rush the process. Natural crystallization takes time, and the waiting is worth the reward of perfectly smooth, creamy honey.
Ingredient Substitutions
- Honey Variety: While specific honey varieties are recommended for certain flavors, feel free to use any raw, unfiltered honey you have on hand. The process remains the same.
- Starter Honey: If you absolutely cannot find creamed honey, you can try to induce crystallization in a small amount of liquid honey by placing it in the refrigerator for a few days, then mashing it until smooth. However, using a proper creamed honey starter yields the best and most reliable results.
Variations
- Flavored Creamed Honey: Infuse your liquid honey with natural flavors before creaming. Add a vanilla bean pod, a cinnamon stick, or a few sprigs of lavender to the honey while it’s gently warming. Strain them out before mixing with the starter.
- Spiced Creamed Honey: Stir in a pinch of ground cinnamon, nutmeg, or cardamom with the starter for a warming, aromatic spread.
Serving Suggestions
Creamy homemade honey is incredibly versatile. Here are a few ideas:
- Breakfast Staple: Spread generously on toast, bagels, muffins, or English muffins.
- Sweetener: Stir into hot tea, coffee, or warm milk for a comforting beverage.
- Baking: Use it in recipes that call for honey, especially those where you want a thicker consistency, like certain cookie doughs or granola bars.
- Yogurt Topping: Swirl into plain Greek yogurt with some fresh fruit and granola.
- Cheese Board: A dollop of creamy honey pairs wonderfully with various cheeses and crackers.
- Dessert Drizzle: Drizzle over ice cream, pancakes, waffles, or fresh fruit.
Storage and Reheating
Once your honey has fully creamed, store the sealed jars in a cool, dark pantry. Creamed honey is very stable and will maintain its texture and quality for a long time, often over a year, provided it’s stored correctly. There’s no need to refrigerate it, as colder temperatures can make it too hard to spread. If your creamed honey somehow reverts to a liquid state (due to heat exposure), you can try to re-cream it by warming it gently, adding a new starter, and repeating the cooling process.
Frequently Asked Questions
What is the difference between liquid honey and creamed honey?
Liquid honey is typically filtered and heated to prevent natural crystallization, keeping it in a liquid state. Creamed honey is also natural honey, but it has been processed to encourage controlled crystallization, resulting in a smooth, spreadable texture with fine crystals, rather than the coarse crystals that form naturally in unfiltered honey.
Can I make creamed honey without a starter?
It’s possible, but much more difficult and less reliable. Without a starter, you would need to wait for natural crystallization to begin, then continuously stir and mash the honey to break down large crystals as they form. Using a starter significantly speeds up the process and ensures a smoother final texture.
Why did my creamed honey turn gritty?
Gritty creamed honey usually indicates that the initial mixing wasn’t thorough enough, or the storage temperature was too high or inconsistent, allowing larger crystals to form. Ensure your starter is well distributed and maintain a cool, consistent temperature during the crystallization phase.
Is creamed honey healthier than liquid honey?
Both liquid and creamed honey offer the same nutritional benefits, assuming they are both raw and unfiltered. The creaming process only changes the physical texture, not the nutritional content.
Final Recipe Notes
Making your own creamy homemade honey is a rewarding experience that yields a delicious and versatile product. It’s a wonderful way to appreciate the natural qualities of honey and customize its texture to your preference. This recipe not only provides you with a delightful spread but also connects you to the ancient art of honey preparation. Enjoy the process and savor the sweet results!
Ingredients
- 1 kg (approx. 2.2 lbs) Liquid Honey (raw, unfiltered recommended)
- 100g (approx. 3.5 oz) Creamed Honey Starter (store-bought or homemade)
Instructions
- Prepare the Liquid Honey: If your liquid honey has already started to crystallize or is very thick, gently warm it in a double boiler or a bowl set over a pot of simmering water. Do not let the temperature exceed 100°F (38°C) as high heat can destroy beneficial enzymes and alter the flavor. Warm it just enough to make it fully liquid and easy to stir.
- Combine with Starter: In a large, clean bowl, combine the warmed liquid honey with the creamed honey starter.
- Mix Thoroughly: Using a spoon, spatula, or a hand mixer on low speed, mix the liquid honey and starter thoroughly. The goal is to evenly distribute the starter crystals throughout the liquid honey. Mix for about 5-10 minutes, ensuring no streaks of unmixed starter remain. The mixture should appear uniform.
- Pour into Jars: Carefully pour the mixture into clean, sterilized glass jars, leaving about half an inch of headspace at the top. Seal the jars tightly with their lids.
- Cool and Store: Place the sealed jars in a cool, dark place with a consistent temperature, ideally between 55-65°F (13-18°C). Avoid extreme temperature fluctuations, as this can lead to uneven crystallization.
- Wait for Crystallization: This is the patience step! The honey will slowly begin to crystallize and thicken over the next few days to a few weeks, depending on the temperature and the type of honey used. Check the jars periodically. Once the honey has a uniform, opaque, and spreadable consistency, it’s ready.
- Enjoy: Once fully creamed, your homemade honey is ready to be enjoyed!
Keep reading — tap the button below to continue.