
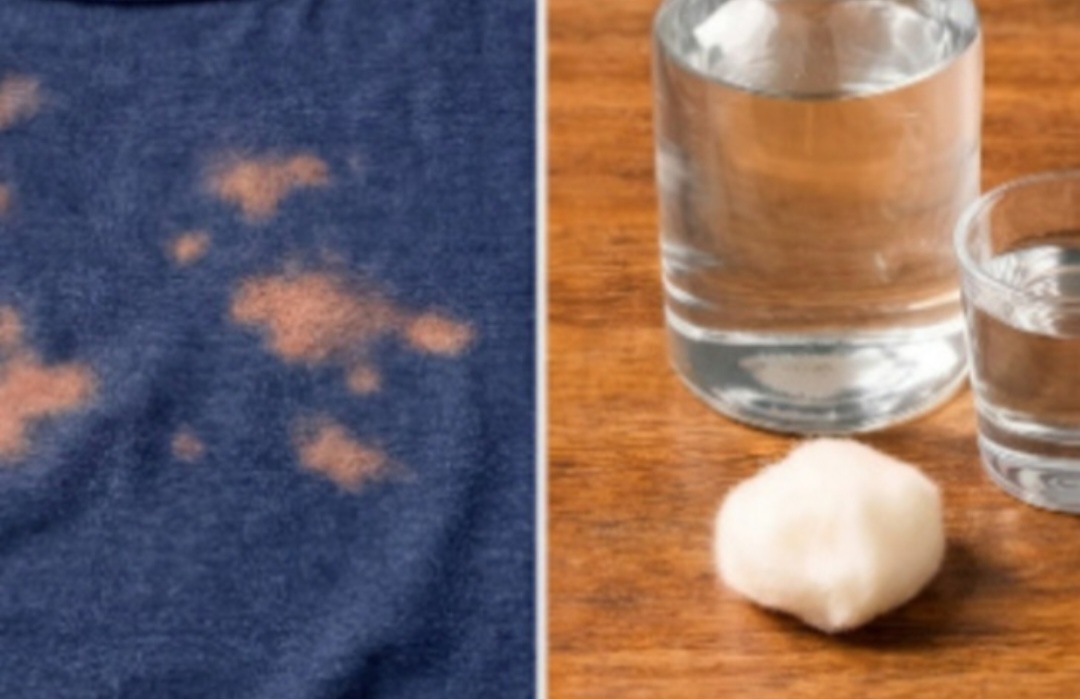
Don’t Toss That Ruined Shirt! How to Fix Bleach Stains Like a Pro (And Save Your Wardrobe)I was in the middle of one of those deep-cleaning sprees where somehow every cabinet, countertop, and forgotten corner of the house suddenly needs attention at once.I was wearing an old oversized T-shirt, bleach bottle in hand, feeling incredibly productive—until one tiny splash landed on my forearm.Without thinking, I grabbed the nearest towel and wiped it away.Unfortunately, that towel happened to be draped over my favorite black linen blouse hanging on the back of the door.I turned around a few moments later and saw it: one pale, unforgiving splotch right in the middle of the chest.I stared at it for a full minute as though sheer disappointment might convince the color to return.It didn’t.For about five seconds, I considered throwing the blouse away. Then I imagined wearing it to dinner and confidently telling everyone the mark was part of some expensive avant-garde design.Neither option felt particularly satisfying.Then I remembered something surprisingly important about bleach marks:A bleach stain isn’t really a traditional stain at all. The bleach has chemically altered or removed some of the fabric’s dye.That means stain remover isn’t going to magically lift it away.But depending on the fabric, the severity of the damage, and where the spot appears, you may still have several ways to make the garment wearable again.And I am very glad I tried, because my blouse survived.So before you toss that favorite black shirt, pair of jeans, sweatshirt, dress, or linen top into the donation pile, here are the bleach-stain rescue tricks worth knowing.First Things First: Is a Bleach Stain Really a Stain?Not exactly.When coffee, tomato sauce, makeup, or grease lands on clothing, a substance has usually been deposited onto the fibers. Cleaning products work by loosening or removing that substance.Bleach behaves differently.Household chlorine bleach can alter the pigments responsible for a fabric’s color. On a dark garment, the damaged area may appear white, yellow, orange, pink, reddish, or significantly lighter than the surrounding material.In other words, there often isn’t anything sitting on top of the fibers waiting to be washed away.Some of the original color is gone.Bleach can also damage textile fibers themselves, which is why severely bleached fabric may eventually become thin, brittle, or weak. Even dye manufacturers caution that bleach-damaged fabric can be difficult to recolor successfully.That’s why your goal isn’t really to “remove the stain.”Your goal is to:Stop additional bleach exposure if the accident just happened.Disguise or recolor a small damaged area.Redye the entire garment when spot matching won’t work.Turn the damage into a decorative feature.Know when the fabric is too weakened to rescue safely.What to Do Immediately After Bleach Gets on ClothingIf you’ve just spilled bleach, speed matters.Rinse the Area ThoroughlyRemove the garment and rinse the affected area generously with cool water as soon as practical.The goal is to dilute and wash away remaining bleach so it isn’t left sitting on the fabric.Don’t immediately start piling random household chemicals onto the spot. Mixing bleach with incompatible cleaning products can create dangerous fumes.Once the garment has been thoroughly rinsed, wash it according to its care label.And whatever you do, resist the temptation to pour additional undiluted bleach around the damaged area hoping to “blend” it.Manufacturers specifically warn against allowing undiluted chlorine bleach to make direct contact with clothing.Method 1: Fix a Tiny Bleach Spot With a Fabric Marker
Method 1: Fix a Tiny Bleach Spot With a Fabric Marker
For one small mark on a solid-colored garment, this is usually the first method I’d consider.
It’s inexpensive, fast, and far less dramatic than redyeing an entire shirt.
What You’ll Need
Choose a permanent fabric marker specifically intended for textiles in a shade as close as possible to your garment.
You’ll also want:
A piece of cardboard
A clean cloth
Good lighting
A scrap of similar fabric for testing, if available
How to Do It
First, make sure the garment has been rinsed, washed, and completely dried.
Slide cardboard beneath the damaged area so color doesn’t bleed through to the opposite side.
Test your marker somewhere inconspicuous, such as inside a hem.
Then gently build color over the bleach spot using light layers rather than aggressively coloring it all at once.
This part takes patience!
Dark fabrics rarely look like one completely flat shade. Black might have blue, brown, charcoal, or green undertones, so repeatedly scribbling over the area can create a darker patch that’s nearly as noticeable as the bleach mark.
Apply a little color, let it settle, compare it in natural light, and add more only if necessary.
Best For
This technique works particularly well for:
Tiny bleach dots
Black T-shirts
Sweatshirts
Jeans
Cotton garments
Small marks near hems, seams, or cuffs
It becomes trickier on highly visible spots, textured materials, prints, or colors that are difficult to match exactly.
Method 2: Redye the Entire Garment
When you’re dealing with several bleach marks—or one large mark right in the middle of the garment—trying to color every individual spot can become frustrating.
Sometimes the cleaner solution is to redye the whole thing.
And this is where my favorite “ruined” clothing suddenly starts looking like a weekend project instead of trash.
Check the Fiber Content First
Before buying dye, read the care label.
Different fibers require different dyes.
Natural and regenerated fibers such as cotton, linen, rayon, and some blends tend to be easier candidates for conventional fabric dye than heavily synthetic garments.
Polyester-rich clothing generally requires dye specifically formulated for synthetic fibers.
The dye manufacturer Rit, for example, notes that its standard color-removing product works best on cotton, linen, wool, rayon, and ramie, while synthetic fabrics behave differently.
Don’t Assume Darker Dye Will Automatically Hide the Spot
This is important.
You might assume you can toss a bleach-damaged black shirt into black dye and everything will emerge perfectly even.
Not necessarily.
Bleach doesn’t simply lighten dye; it can also damage the underlying fibers. Because of that, the damaged area may absorb new dye differently from the untouched fabric.
Rit specifically warns that bleach spots can be difficult to cover and that success isn’t guaranteed.
For badly uneven garments, removing or reducing more of the original color before redyeing may sometimes create a more uniform starting point—but follow the manufacturer’s directions carefully rather than improvising with additional chlorine bleach.
Best For
Whole-garment dyeing is worth considering when:
There are several bleach marks.
The garment is heavily faded anyway.
You want to change the color completely.
Spot repair looks obvious.
The item is made from a dye-friendly fiber.
And yes, there’s something incredibly satisfying about pulling an apparently ruined shirt out of a dye bath and realizing you’ve given it an entirely new personality.
Method 3: Turn the Bleach Spot Into a Design
This might be my favorite solution because it removes the pressure to make everything invisible.
Can’t hide it?
Make it look intentional.
A small damaged section can become the starting point for something genuinely fun.
Try Embroidery
Cover the mark with:
Flowers
Stars
Leaves
Initials
Tiny mushrooms
Hearts
Geometric shapes
A tiny floral embroidery over an accidental bleach mark can look so deliberate that nobody would ever suspect there was a laundry disaster underneath.
Add a Patch
Decorative patches are perfect for larger marks, particularly on denim jackets, jeans, sweatshirts, and casual shirts.
You can choose something subtle that coordinates with the garment or go completely bold.
Create a Larger Pattern
If the garment can tolerate it and you understand how the fabric reacts, you can sometimes incorporate the accidental discoloration into a larger intentionally distressed or reverse-dyed design.
This is definitely the “If you can’t beat it, make it fashion” approach.
And sometimes it turns out better than the original piece.
Method 4: Use Textile Paint for Difficult-to-Match Areas
Fabric paint can be another option when a marker isn’t providing enough coverage.
This works particularly well when the garment has:
A graphic pattern
Decorative details
Large blocks of color
Artwork
A design that can easily be expanded
Instead of trying to replicate the original color perfectly, consider painting something over the area.
A tiny leaf, flower, star, stripe, or abstract shape can make the repair look completely intentional.
Follow the fabric-paint manufacturer’s curing and washing instructions so your new design survives the laundry.
Why Regular Stain Remover Won’t Fix Bleach Marks
This is one of the biggest misconceptions surrounding bleach accidents.
A conventional stain remover may be wonderful for food, grease, makeup, or other removable substances.
But it cannot restore pigment that bleach has already destroyed.
Likewise, “color-safe bleach” is not a magical treatment that recolors a spot.
Color-safe laundry bleach is generally a non-chlorine peroxide-based product used to remove stains and brighten washable colored clothing. It isn’t designed to replace dye that chlorine bleach has already stripped away.
So if the mark is already pale, orange, yellow, or white, stop searching for increasingly aggressive stain removers.
Think color restoration or camouflage, not stain removal.
Can You Use a Permanent Marker on Bleach Stains?
People absolutely do it.
For a tiny black spot, a black permanent marker may initially seem like a brilliantly simple fix.
And in an emergency?
It can disguise the area.
But a proper textile marker is usually the better choice because it is designed specifically for fabric and laundering.
Ordinary markers may:
Fade differently from the garment
Develop an unusual undertone
Look shiny
Bleed
Transfer
Create an obvious dark circle
If your beautiful black blouse suddenly has one tiny bleach dot five minutes before you’re supposed to leave the house, though, I understand why that marker drawer starts looking extremely tempting.
Can Vinegar Remove Bleach Stains?
No household acid can magically restore color that bleach has already removed.
More importantly, do not start mixing vinegar or other household cleaners with bleach.
Chlorine bleach should never be casually combined with other cleaning chemicals.
If you’ve just had a bleach spill, your safest simple first step is plenty of water and proper laundering according to the clothing label—not a homemade chemistry experiment.
Can Baking Soda Fix Bleach Stains?
Baking soda may have countless household cleaning uses, but it cannot replace missing textile dye.
Once the color has been chemically altered, you need to restore or disguise that color.
So while a baking-soda hack may sound wonderfully easy on social media, don’t expect it to turn a pale orange bleach patch back into black fabric.
Can You Dye a Bleach Stain Back to Its Original Color?
Sometimes.
But this is one of those answers nobody loves:
It depends.
Results can vary based on:
Fabric composition
Original dye
Amount of bleach exposure
Fiber damage
Dye color
Garment construction
Whether you’re spot dyeing or redyeing everything
Bleach-damaged areas may not accept new dye exactly the same way the surrounding undamaged fibers do. That’s why even dye manufacturers don’t guarantee that redyeing will completely conceal bleach damage.
For a valuable or delicate garment, consider a professional textile cleaner or dye specialist rather than experimenting.
Fabrics That Need Extra Caution
Not every garment should become a DIY dye project.
Be especially careful with:
Silk
Silk is delicate and can be damaged by chlorine bleach. Clorox’s own textile guidance lists silk among fibers that should not be treated with regular chlorine bleach.
Wool
Wool is another material that should not be exposed to regular chlorine bleach.
Spandex
Chlorine bleach can damage spandex fibers, making experimentation particularly risky for leggings, swimwear, fitted tops, and stretch garments containing elastane/spandex.
Leather and Suede
These require specialized cleaning and coloring methods. Skip DIY laundry hacks and consult a professional when the item is valuable.
Special-Finish and Structured Garments
Anything labeled:
Dry clean only
Hand wash only
Do not bleach
Do not soak
deserves extra caution.
Always read the care label before beginning.
What If the Bleach Damaged the Fabric, Not Just the Color?
This is the point where cosmetic repairs aren’t enough.
Look closely at the affected area.
Does it feel:
Thin?
Rough?
Brittle?
Weak?
Papery?
Different from the surrounding fabric?
If so, the bleach may have weakened the fibers themselves.
Dye can restore color, but it cannot restore the original strength of chemically damaged fibers.
If the affected section is beginning to tear, patching, embroidery, visible mending, or professional repair may be more appropriate than simply coloring it.
How I Saved My Black Blouse
My own blouse had one relatively small damaged section rather than widespread bleaching, so I didn’t immediately reach for a giant pot of dye.
I rinsed and washed the blouse first, let it dry completely, and inspected the fabric carefully.
Fortunately, the fibers still felt strong.
Then I worked slowly to camouflage the discoloration rather than trying to make the entire repair happen in one aggressive pass.
And that was the secret.
Not perfection.
Patience.
Once I stopped examining the area from three inches away and actually put the blouse on, the repair blended in far better than I expected.
I wore it again.
And yes, I felt absurdly pleased every time I did.
Saving something you genuinely love from the trash feels like a tiny victory.
How to Prevent Bleach Stains Next Time
My unfortunate blouse-and-towel situation taught me several things very quickly.
Wear Clothing You Truly Don’t Care About
Not your “old but still kind of cute” shirt.
Not your “I only wear this around the house” sweater.
Actual cleaning clothes.
Because bleach apparently has a supernatural ability to find the one garment you secretly still love.
Keep Good Clothing Out of the Room
If you’re deep cleaning, don’t hang tomorrow’s outfit nearby.
Learn from me.
Avoid Pouring Bleach Directly Over Clothing
Undiluted bleach contacting fabric is exactly the type of accident manufacturers warn against.
Measure carefully and follow the product’s dilution instructions.
Test Colored Fabrics Before Bleaching
If you’re intentionally using chlorine bleach on a colored fabric, test an inconspicuous area first.
Clorox recommends checking the fiber content and testing a hidden hem or seam for colorfastness before bleaching colored garments.
Protect Your Hands and Work Area
Follow the safety instructions printed on your specific bleach product, work with adequate ventilation, and prevent splashes from reaching surrounding fabrics.
Frequently Asked Questions About Bleach Stains
Are bleach stains permanent?
The original color loss usually is. Once bleach has chemically altered the dye, washing the garment won’t restore the missing pigment.
However, the appearance of the bleach mark may be improved using textile markers, dye, paint, embroidery, patches, or other creative repairs.
Can black clothes with bleach stains be fixed?
Black clothing is often a good candidate for camouflage because black fabric markers and dark dyes are widely available.
That said, achieving a perfect shade match isn’t guaranteed.
Why did bleach turn my black shirt orange?
The final color you see depends on the dyes originally used to create the fabric’s color and how those pigments react to bleach.
Black fabric isn’t necessarily made from one simple black pigment, so removing part of its color can reveal unexpected orange, red, yellow, or brown tones.
Will washing remove a bleach stain?
No. Washing may remove any remaining bleach after an accident, but it cannot restore color that has already been removed.
Can I just put black dye directly on one spot?
You can attempt localized recoloring, but spot dyeing may produce an uneven patch.
For very tiny areas, a textile marker often offers more control. For widespread discoloration, redyeing the entire garment may look more natural.
Should I redye a bleach-damaged garment?
It can be worth trying when the fabric remains structurally sound and you’re prepared for results that may not be perfectly even.
Check the fiber composition first and follow the instructions supplied with the dye.
Can bleach damage fabric permanently?
Yes. Chlorine bleach can affect more than color, and severely exposed fibers may weaken. Dye cannot reverse structural fiber damage.
Is a fabric marker washable?
Markers made specifically for textiles are designed for fabric, but laundering instructions vary by brand. Follow the manufacturer’s directions for setting, curing, and washing the color.
Before You Throw That Shirt Away…
A bleach mark feels incredibly final when you first notice it.
One second you’re happily cleaning the kitchen, and the next you’re holding your favorite black blouse under the light thinking, Well, that’s ruined.
But “ruined” doesn’t always have to mean “trash.”
A tiny spot might disappear beneath a textile marker.
A larger one might inspire an entirely new dye job.
An awkward mark might become the perfect excuse for embroidery.
And a badly damaged pair of jeans?
Maybe they were destined for patches all along.
The most important thing to remember is that bleach damage isn’t a conventional stain, so don’t waste hours trying increasingly aggressive stain-removal tricks.
Inspect the fabric first.
Then decide whether your best option is to recolor it, redye it, decorate it, patch it, or repurpose it.
My black blouse never became factory-perfect again.
But it became wearable.
And considering I had been seconds away from tossing it, I’ll happily call that a win.
If you’ve ever rescued a bleach-damaged piece of clothing, I’d love to know which method worked for you. Save this guide to Pinterest for the next laundry emergency—and share your before-and-after photos, because sometimes the best wardrobe transformations begin with a complete accident.